{Milk Bar Monday} Fudgy Brownie Pie
Remember Milk Bar Mondays you guys? If you’re at all new to these parts you may need a bit of a refresher. You see- about a year and a half ago a few bloggers and I started the long project of baking our way through the confectionary genius that is the Momofuku Milk Bar Cookbook. It is full of extremely complex but amazingly delicious recipes that have inspired and challenged all of us during this project. (Be sure to check out the rest of the project in the archives.)
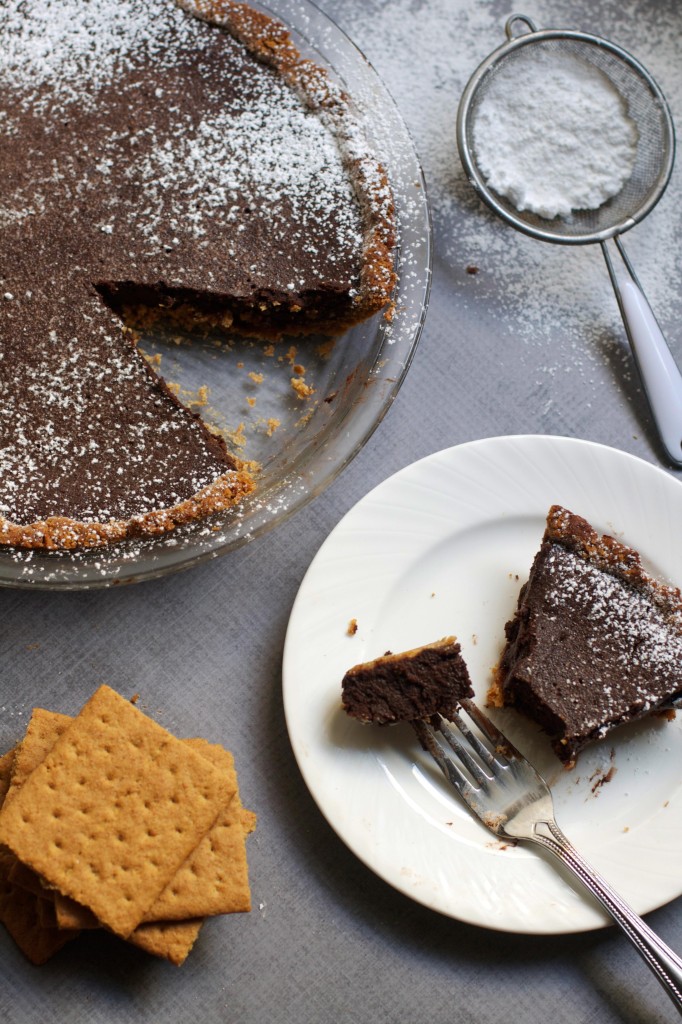
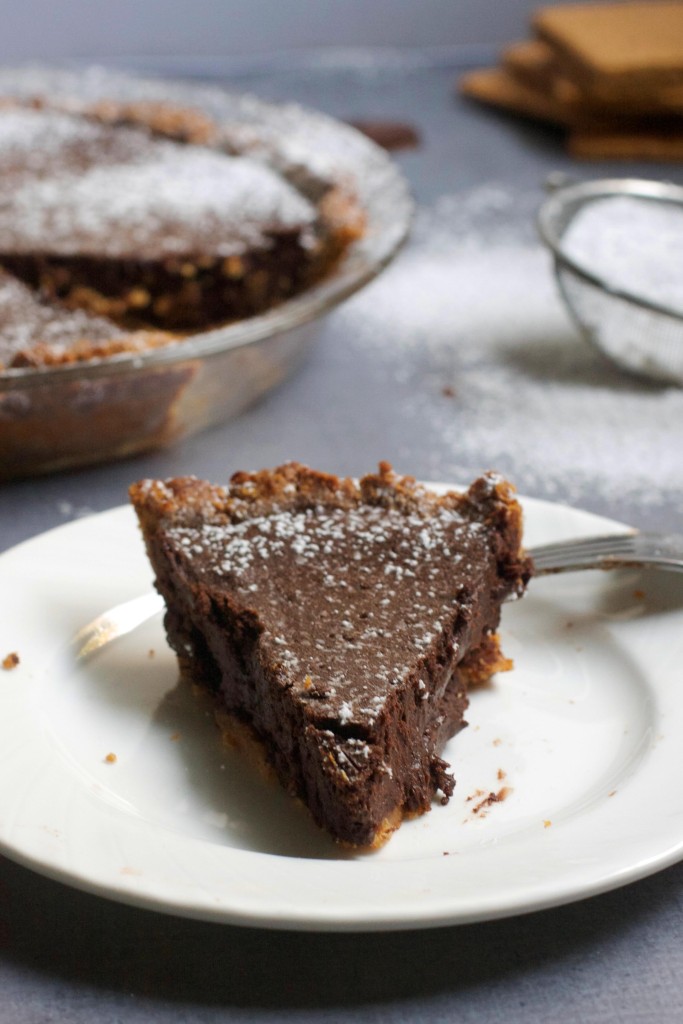
So I mentioned on Friday that this is becoming “pie month” and I’m keeping true to that promise. (Though after today you may not see one for a week or so ;) ) This fudgy brownie pie is everything you want in a pie with that name. First, a slightly salty graham cracker crust, and then a rich, chocolate-y, fudgy filling that is a chocolate-lover’s dream. It is silky smooth, full of dark deep chocolate flavor and the perfect base for a scoop of ice cream, whipped cream, or hot fudge. (Though I enjoyed it with a sprinkling of powdered sugar and nothing else.
I really really love pie, and one of the reasons is how many different flavors and options there are. I’ve never made a chocolate pie before, but I think this would be such a great addition to a pie spread. It definitely feels like a holiday pie while still fulfilling the brownie/chocolate cake-loving crowd. I’m always a fruit-pie lover before anything else, but it sure would be nice to have a dessert spread of all pies with this as one of them. (PS- I think I need to have a pie party!!)
Please make sure to check out the pie creations of Erin and Jacqueline (who made hers dairy and gluten free!) And if you haven’t bought yourself the Momofuku Milk Bar Cookbook yet- please get on that- it kinda changed my life!
{Milk Bar Monday} Fudgy Brownie Pie
Recipe from the Momofuku Milk Bar Cookbook by Christina Tosi
Ingredients
- 3/4 recipe Graham Crust* or, 1 ½ cups (recipe below)
- 4.5 ounces 72% chocolate
- 6 tablespoon butter
- 2 eggs
- 3/4 cup sugar
- 1/4 cup flour
- 3 tablespoons cocoa powder, preferably Valrhona
- 1/2 teaspoon kosher salt
- 1/2 cup heavy cream
For the Graham Crust:
- 1 1/2 cups graham cracker crumbs
- 1/4 cup milk powder
- 2 tablespoons sugar
- 3/4 teaspoon kosher salt
- 4 tablespoons 1/2 stick butter, melted
- 1/4 cup heavy cream
Instructions
- Heat the oven to 350°F.
For the crust:
- Combine the crumbs, milk powder, sugar and salt together in a medium-sized bowl. Add the melted butter and heavy cream. Stir together, moistening the dry ingredients with the butter and cream. If the mixture doesn't hold it's shape when pressed together, add another tablespoon of butter until it can do so.
For the pie:
- Reserve 1/4 cup of the graham crust and dump the rest into a 10-inch pie tin. With your fingers and the palms of your hands, press the crust firmly into the bottom and up the sides of the pie tin, covering the bottom and sides of the pan completely.
- Heat the chocolate and butter together in a large microwave-safe bowl for about 50 seconds. Use a heatproof spatula to stir them together, working until the mixture is glossy and smooth. (Heat for another 15-20 seconds at a time if not totally melted.)
- Combine the eggs and sugar in the bowl of a stand mixer fitted with the whisk attachment and whip together on high for 3 to 4 minutes, until the mixture is fluffy and pale yellow and has reached the ribbon state. (Detach your whisk, dunk it into the whipped eggs, and wave it back and forth like a pendulum: the mixture should form a thickened, silky ribbon that falls and then disappears into the batter.) If the mixture does not form ribbons, continue whipping on high as needed.
- Replace the whisk with the paddle attachment. Dump the chocolate mixture into the eggs and briefly mix together on low, then increase the speed to medium and paddle the mixture for 1 minute, or until it is brown and completely homogenous. If there are any dark streaks of chocolate, paddle for a few seconds longer, or as needed. Scrape down the sides of the bowl.
- Add the flour, cocoa powder, and salt and paddle on low speed for 45 to 60 seconds. There should be no clumps of dry ingredients. If there are any lumps, mix for an additional 30 seconds. Scrape down the sides of the bowl.
- Stream in the heavy cream on low speed, mixing for 30 to 45 seconds, just until the batter has loosened up a little and the white streaks of cream are fully mixed in. Scrape down the sides of the bowl.
- Detach the paddle and remove the bowl from the mixer. Gently fold in the 45 g (1/4 cup) graham crust with a spatula. (These crumbs will add little bursts of flavor and texture into the pie filling.)
- Grab a sheet pan and put your pie tin of graham crust on it. With a spatula, scrape the brownie batter into the graham shell. Bake for 25 minutes. The pie should puff slightly on the sides and develop a sugary crust on top. If the brownie pie is still liquid in the center and has not formed a crust, bake it for an additional 5 minutes or so.
- Cool the pie on a rack. (You can speed up the cooling process by carefully transferring the pie to the fridge or freezer directly out of the oven if you’re in a hurry.) Wrapped in plastic, the pie will keep fresh in the fridge for up to 1 week or in the freezer for up to 2 weeks.
Notes
*I suggest making the full recipe for graham crust and just either making an extra thick crust, or snacking on the remaining 1/4 of the recipe. It's so so good.
Nutrition Information:
Yield: 1 Serving Size: 1 gramsAmount Per Serving: Unsaturated Fat: 0g


Oh my wow! This looks great and so insanely fudgey!
This pie looks amazing!! A great twist on the classic fruit-based pies! Also, I’ve loved your previous Milk Bar Mondays posts and I’m so happy you’ve “re-started” the series!
xo, Elisa
Brownie pie?! HOLY SMOKES!
I love Milk bar Mondays! I’ve made quite a few things from the cookbook and love it. I should make this pie for thanksgiving, it looks so rich and delicious :)
I’m not sure how I missed this one in that book because this is so something I would make. Looks delicious, Audra!
ADORE your photos and take on this, as always. I’m glad to see my gluten/dairy-free version doesn’t look much more dense than yours and that you too enjoyed it best out of the fridge! I was skeptical at first because it’s SO MUCH CHOCOLATE and then my roommate and I could NOT STOP EATING IT FOR DAYS! Next up – Pistachio Layer Cake! Already excited for December! xoxo
That pie looks so rich and decadent, which is exactly how I like my pie! This is a holiday contender for sure!
I love chocolate. I tend to shy away from pies because they are all fruit. Love this!
You had me at fudgy! I think a pie party would be an awesome idea, I wish we lived closer to one another!
Oh man, chocolate pie. This looks amazing. Plus I love anything with a graham cracker crust. !! weekend project :)
I am not a pie person. The only pies I like are pumpkin and chocolate. And this looks like an absolutely amazing chocolate pie! goodness I could die and go to heaven from a single bite I bet :)
YESSSS PIE MONTH!!! This pie looks so incredibly chocolatey and rich! LOVE!
This looks great Audra! This was a great pick for this month. I totally agree, this could hold it’s own on a holiday dessert spread. It is so versatile too! I’ll be making this one again :)
You could just call this COCO PIE!
*tummy rumbles*
Is Valrhona a Dutch process cocoa? I’ve got King Arthur Dutch process cocoa here and I’ve got Hershey’s – not sure which to use! Thanks!
I love everything about this pie! I’ve never actually had chocolate pie before… so this might have to be my first go at it! And I totally remember when you had Milk Bar Mondays… I looked forward to those posts every week!
This looks and sounds incredible!! When I read the name, I was already reeled in ;)
That looks soooo mouthwatering :)
What a cute blog! this brownie pie looks amazing!
I am making this right now actually and it smells divine. It is still liquid in the center and I have baked for 35 minutes already. Any ideas on why it might be taking so long? My oven is fairly accurate.
I made this for thanksgiving this year. It is rich and delicious! I used premade graham cracker crusts. Thanks for a great recipe!
Any comment which contains the word “looks” should be deleted.
Count how many comments for this recipe contain that word and you’ll see what I’m talking about.
I’m sorry to be bitchy, but to me a comment should be a reflection on how it turned out, if it tasted good, etc. Anything regarding the appearance of a typewritten list of ingredients or a beautiful picture should automatically be discarded.
Any comment which contains the word “looks” should be deleted.
Count how many comments for this recipe apply and you’ll see what I’m talking about.
I’m sorry to be bitchy, but to me a comment should be a reflection on how it turned out, if it tasted good, etc. Anything regarding the appearance of a typewritten list of ingredients or a beautiful picture should automatically be discarded.