Buttery Make-Ahead Dinner Rolls
Today I bring to you a recipe that is going to make your Thanksgiving prep way easier. If you’re someone like me who likes to plan and prepare things ahead to avoid last minute kitchen stress, you will love this. These are the butteriest softest dinner rolls, and you can make them today, freeze them and then bake them fresh on Thanksgiving. Nothing quite beats a freshly-baked dinner roll, so this way you get that without waking up early to prep.
The recipe itself requires little hands-on work and I personally love forming the round rolls and watching them rise. After letting the dough proof and assembling the rolls- you can either let it proof one more time for an hour, or wrap the pan tightly and freeze them until you’re ready to use. Simply place the frozen pan in a warm place for 2-1/2 hours and they will be poofy and ready to bake. (My kitchen is always warm when I’m prepping Thanksgiving so I don’t think I’ll have a hard time finding a warm spot.)
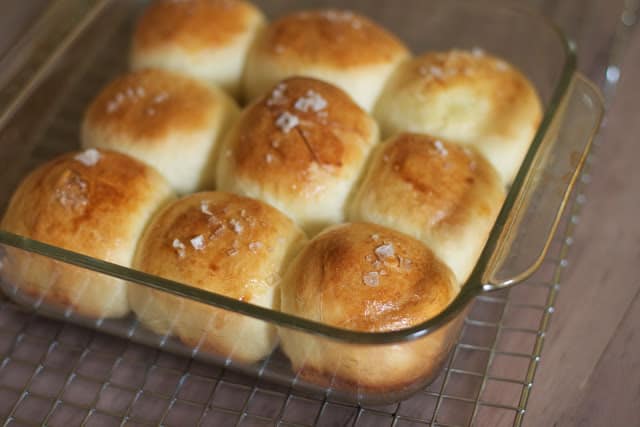
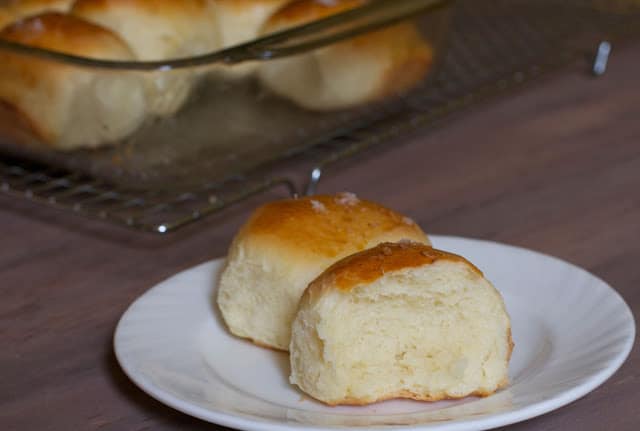
Before baking I brushed these with egg and sprinkled on some flaky sea salt. If you prefer poppy seeds, sesame seeds, or herbs- you can play around with that. The texture of these is soft and airy, and will be perfect for sopping up gravy and cranberry sauce!
PS- Don’t be afraid of making recipes that require yeast! I used to be hesitant but it is really so easy and actually very fun. The science-loving kid in me loves watching the dough double in size. :)
Buttery Make-Ahead Dinner Rolls
Ingredients
- 1/4 cup warm water, 115 degrees
- 2 packets, 1/4 ounce each active dry yeast
- 1 1/2 cups warm whole milk, 115 degrees
- 1/2 cup 1 stick unsalted butter, melted, plus more for bowl and pans
- 1/4 cup sugar
- 2 1/4 teaspoons salt
- 3 large eggs
- 6 to 6 1/2 cups all-purpose flour, spooned and leveled, plus more for work surface
Instructions
- Place water in a small bowl; sprinkle with yeast, and let stand until foamy, about 5 minutes.
- In the bowl of a stand mixer fitted with paddle attachment, mix together milk, butter, sugar, salt, and 2 eggs until combined. Mix in yeast mixture.
- With mixer on low speed, add 6 cups flour, 1 cup at a time, until you have a soft, shaggy dough (if necessary, add up to 1/2 cup more flour).
- Replace paddle with the dough hook and process until smooth and elastic, 5 to 10 minutes. (No mixer? That's OK. You can do this with a whisk and a wooden spoon for the flour. Then knead by hand for 5-10 mis.)
- Butter the inside of a large bowl; place dough in bowl, turning to coat. Cover bowl with a clean kitchen towel; let stand in a warm spot until dough has doubled in size, about 1 1/4 hours.
- Butter two 13-by-9-inch baking pans. (Or 3 8x8 pans if you want smaller batches.) Divide dough in half. Roll each half into a 15-inch rope; cut each rope into 15 1-inch pieces. Press each piece into a disk, then shape into a ball. (Don't handle the dough too much or it will become tough.)
- Arrange dough balls in prepared pans. (To make ahead: Wrap pans well, and freeze, up to 2 months.)
- Cover pans loosely with kitchen towel; let stand in a warm spot until rolls have doubled in size, about 1 1/4 hours (2 hours more if frozen).
- Preheat oven to 375 degrees, with racks in upper and lower thirds.
- In a small bowl, beat remaining egg until blended; brush onto rolls. Sprinkle with sea salt or herbs.
- Bake until golden brown, about 20 minutes, rotating pans back to front and top to bottom halfway through. Let rolls cool 15 minutes before serving.
Nutrition Information:
Yield: 30 Serving Size: 1 gramsAmount Per Serving: Unsaturated Fat: 0g
Recipe adapted from: Martha Stewart


Oh, these look delicious and I am always looking for more dinner roll ideas!
Oh man I got excited thinking it only made 9 rolls when I saw that first picture. I only cook for one, and sometimes two so idk what I would do with 30! I could freeze them though.
I’ve done a refrigerated version, but not frozen – think I will try this one for Thanksgiving… good idea
You are a genius! Awesome recipe!
Make-ahead is the way to go. These look so light and fluffy!
Wow, these look beautiful. I have only worked with yeast a few times in my life. It’s fun to do, but I just never really have the desire to work with it. I do love the look of these rolls though! :)
Thanks for the recipe. I needed a roll recipe for thanksgiving. Not making them that day works. I’m using it.
I think I’m going to try these for Thanksgiving!!!
These are PERFECT Audra, pure perfection.
Oh man, those rolls look so buttery and soft!! I’m not hosting this year, but if I were, there’s a VERY good chance these would be on my table :)
Just made the dough and it’s rising right now (hopefully)! Is the dough supposed to be SUPER sticky? I couldn’t even turn it in the bowl. I’ll report back later!
You may need to add a little more flour! Dough- shouldn’t be too sticky after kneading.
I made these today to see if I might want to make them for Thanksgiving (I do). They’re delicious and so easy – thanks so much for sharing the recipe!
Yummy! Question: If I want to make them just the day before, do I have to put them in the freezer? Could I just pop them in the frig overnight, and then do the second rise and bake the next day? I would think it would be ok, but thought I would ask your opinion! Thanks!
Great recipe, Audra! I’m making these now and freezing until we celebrate on Saturday (sadly no public holiday for Thanksgiving in Oz, but the show must go on) :)
I have the same question!
Hey Ladies! Yes- you can absolutely do that. I’m not sure of exactly how long you will need to proof the rolls but I’d say an additional 30-45 minutes since they’ll start out cold.
Oh I’m so glad you liked them!
Saturday works! It must be hard for you to miss out on some of your old US holidays- I’m glad you get to squeeze them in anyways! :)
How many pans do you use/ how far apart do you want to place the balls?
never mind…. I’m a goof.
Will it be ok if they are out of the freezer longer than 2 hours before you bake them. I want to take them out before church and bake after we get home.