Marble Pound Cake
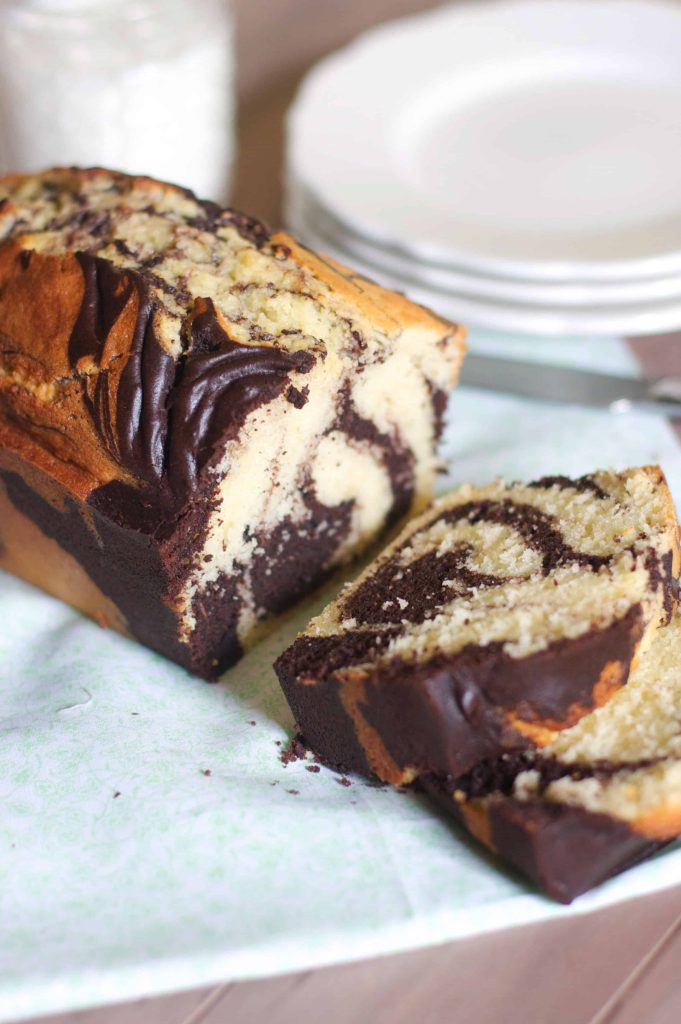
If you’re craving a classic dessert that’s both beautiful and delicious, look no further than marble pound cake. This classic treat combines the rich flavors of chocolate and vanilla in a moist, dense crumb that’s perfect for any occasion, a morning snack with a cup of coffee, or just an afternoon treat!
To make moist Marble Pound cake you start with a vanilla cake batter and then put half of it into another bowl. Mix cocoa powder into half of the batter and then spoon them into the cake pan in a checkerboard pattern. Swirl the batters and bake to beautiful perfection!
Ingredients for Marble Pound Cake Recipe:
- Unsalted butter, room temperature
- Cake flour
- Baking powder
- Salt
- White sugar
- Large eggs, room temperature
- Pure vanilla extract
- Buttermilk, room temperature
- Dutch-process cocoa powder
- butter or spray for pan
Supplies needed for Marble Cake Recipe:
- Cooling Rack
- Large Bowl
- Rubber Spatula
- Loaf Pan
 Instructions:
- Preheat your oven to 350°F (Grease and flour a loaf pan and set aside.)
- Mix the dry ingredients: In a medium bowl, whisk together the all-purpose flour, cake flour, baking powder, and salt. Set aside.
- Prepare the wet ingredients: In a large mixing bowl, cream together the butter and sugar until light and fluffy using a hand mixer or stand mixer.
- Add the eggs, one at a time, mixing well after each addition. Stir in the vanilla extract.
- Alternate adding the dry ingredients and sour cream: Gradually add the dry ingredients to the wet ingredients, alternating with the buttermilk, beginning and ending with the flour mixture. Mix until just combined.
- Divide the batter: Scoop some of the batter into another bowl and set aside.
- In a separate small bowl, mix the cocoa powder and 1/4 cup plus 2 tablespoons of boiling water until smooth. Add the cocoa mixture to the small bowl of cake batter; and stir it well for chocolate batter.
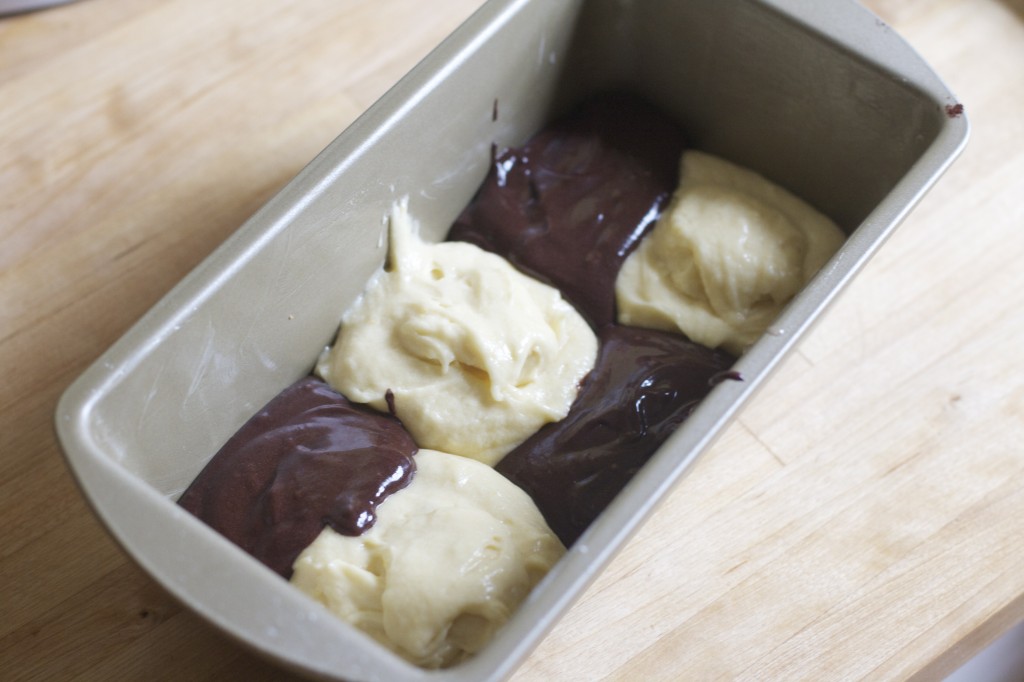
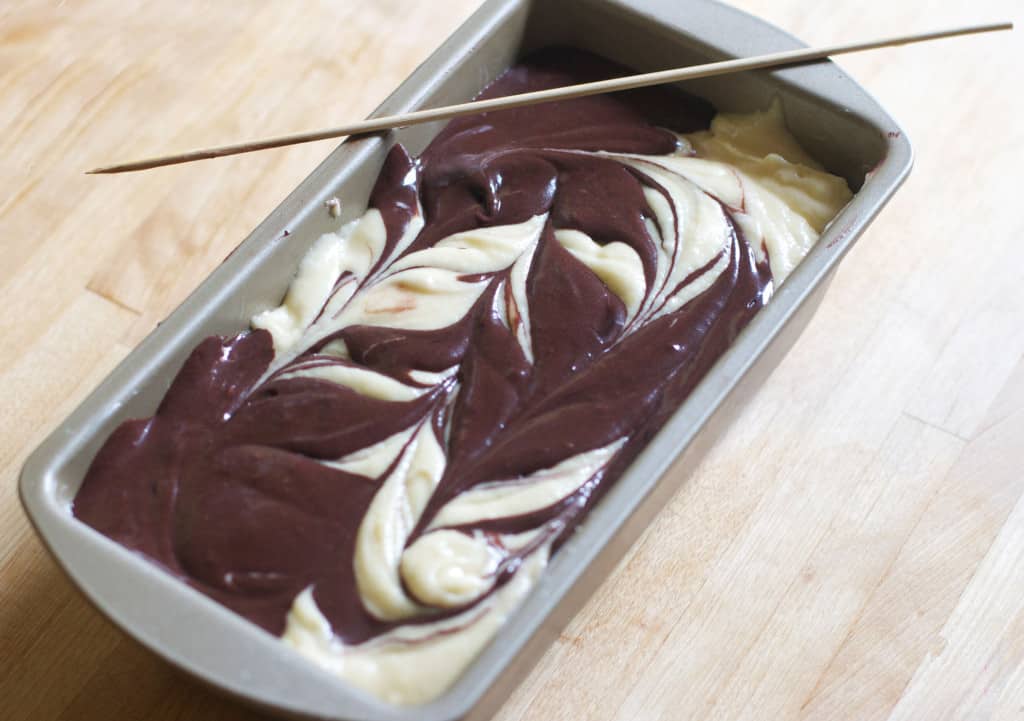
- Create the marble effect: Create a checkerboard pattern in the bottom of the prepared pan by spooning dollops of the separate batters on opposite sides of the pan. (see picture below recipe.) For the second layer, alternate the pattern, spooning vanilla batter over the chocolate cake batter and vice versa. Finish with a final layer of batter- again alternating it from the pattern of the 2nd layer. Scrape the sides of the bowls as needed.
- The Swirl: Use a knife or skewer to swirl all the batters together. Make a couple figure 8s and run it back and forth so it is swirled and pretty.
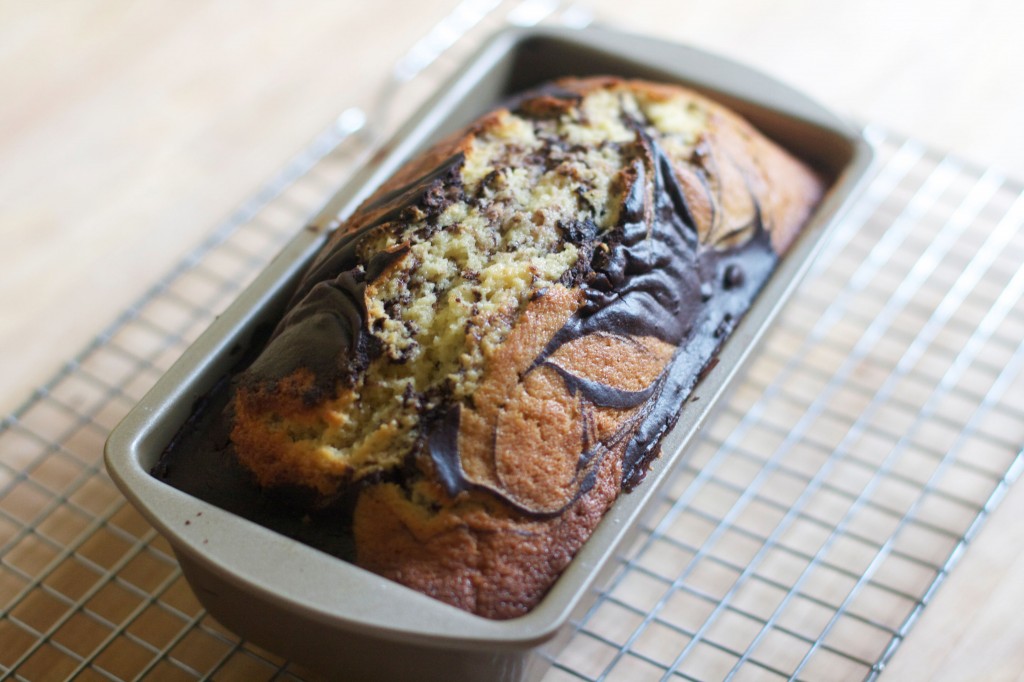
- Bake until a cake tester inserted into the top of the cake comes out with a few moist crumbs, 50 to 60 minutes. Transfer pan to a rack to cool 10 minutes. Turn out cake from pan and cool completely on the rack. Cake can be kept in an airtight container at room temperature up to 3 days.
- Cool completely in the pan on a wire rack before slicing and serving.
Tips and Tricks
- Room Temperature Ingredients: Make sure your eggs, butter, and buttermilk are all at room temperature before you begin. Room temperature ingredients blend more smoothly, resulting in a lighter, fluffier texture.
- Swirling Technique: When swirling the vanilla and chocolate batters together, use a gentle hand and avoid over-mixing. A few quick swirls or “figure 8s” with a butter knife or skewer should be enough to create a beautiful marble effect without blending the batters too much.
- Proper Pan Preparation: Grease and flour your loaf pan thoroughly. This prevents the cake from sticking and ensures easy removal after baking.
- Baking Time: Keep a close eye on your cake as it bakes. Every oven is different, so baking times may vary. Insert a toothpick or cake tester into the center of the cake to check for doneness. If it comes out with a few moist crumbs, the cake is ready.
- Cooling the Cake: Allow the cake to cool in the pan for about 10-15 minutes before transferring it to a wire rack to cool completely. Cooling the cake in the pan helps it set and prevents it from falling apart when you take it out of the pan.
- Storage: Store any leftover marble pound cake in an airtight container at room temperature for up to three days. If you want to keep it longer, you can freeze it for up to a month. Wrap slices individually in plastic wrap and then aluminum foil before freezing for best results.
Other Easy Cake Recipes:
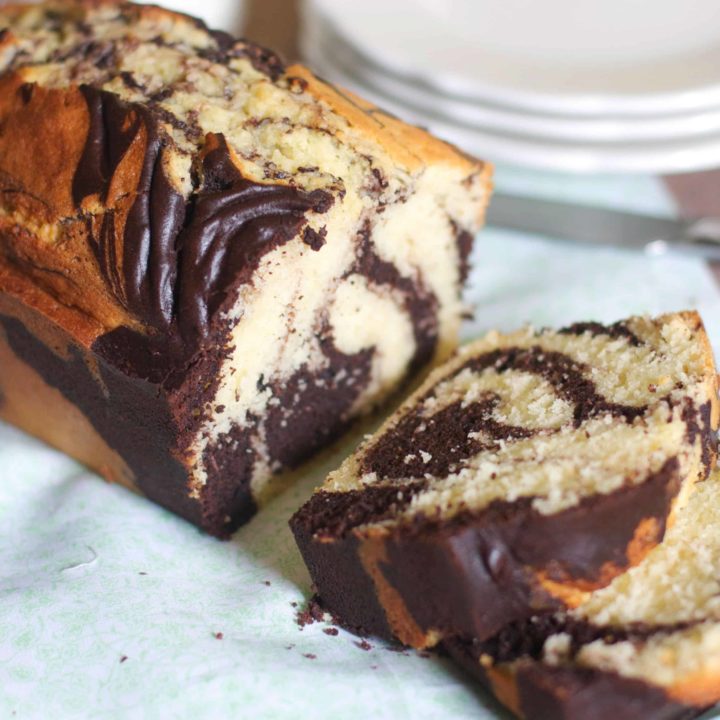
Marble Pound Cake
Ingredients
- 1/2 cup 1 stick unsalted butter, room temperature
- 1 3/4 cups cake flour
- 2 teaspoons baking powder
- 1/2 teaspoon salt
- 1 cup sugar
- 3 large eggs, room temperature
- 1 teaspoon pure vanilla extract
- 2/3 cup buttermilk, room temperature
- 1/4 cup plus 1 tablespoon Dutch-process cocoa powder
- butter or spray for pan
Instructions
- Preheat oven to 350 degrees. Generously butter or spray a 9-by-5-inch loaf pan; set aside.
- Whisk together the cake flour, baking powder, and salt; set aside.
- In the bowl of an electric mixer fitted with the paddle attachment, beat the butter and sugar until light and fluffy, about 5 minutes. Add eggs, one at a time, beating until combined after each addition and scraping down the sides of the bowl as needed. Mix in vanilla. Add flour mixture in 3 batches, alternating with the buttermilk and beginning and ending with the flour.
- Scoop 1/3 of the batter into another bowl and set aside.
- In a separate small bowl, mix the cocoa powder and 1/4 cup plus 2 tablespoons of boiling water until smooth. Add the cocoa mixture to the small bowl of cake batter; and stir it well.
- To assemble the cake- start by creating a checkerboard pattern in the bottom of the pan by spooning dollops of each batter on opposite sides of the pan. (see picture below recipe.)
- For the second layer, alternate the pattern, spooning vanilla batter over the chocolate and vice versa.
- Finish with a final layer of batter- again alternating it from the pattern of the 2nd layer.
- Use a knife or skewer to swirl all the batters together. Make a couple figure 8s and run it back and forth so it is swirled and pretty.
- Bake until a cake tester comes out clean, 40 to 60 minutes*. Transfer pan to a rack to cool 10 minutes. Turn out cake from pan and cool completely on the rack. Cake can be kept in an airtight container at room temperature up to 3 days.
Notes
* I know this is a wide range, but every oven is different. I needed the full 60 minutes for my cake to bake through. Start with 40 minutes and add more time as needed. Recipe from: Martha Stewart
Nutrition Information:
Yield: 1 Serving Size: 1 gramsAmount Per Serving: Unsaturated Fat: 0g

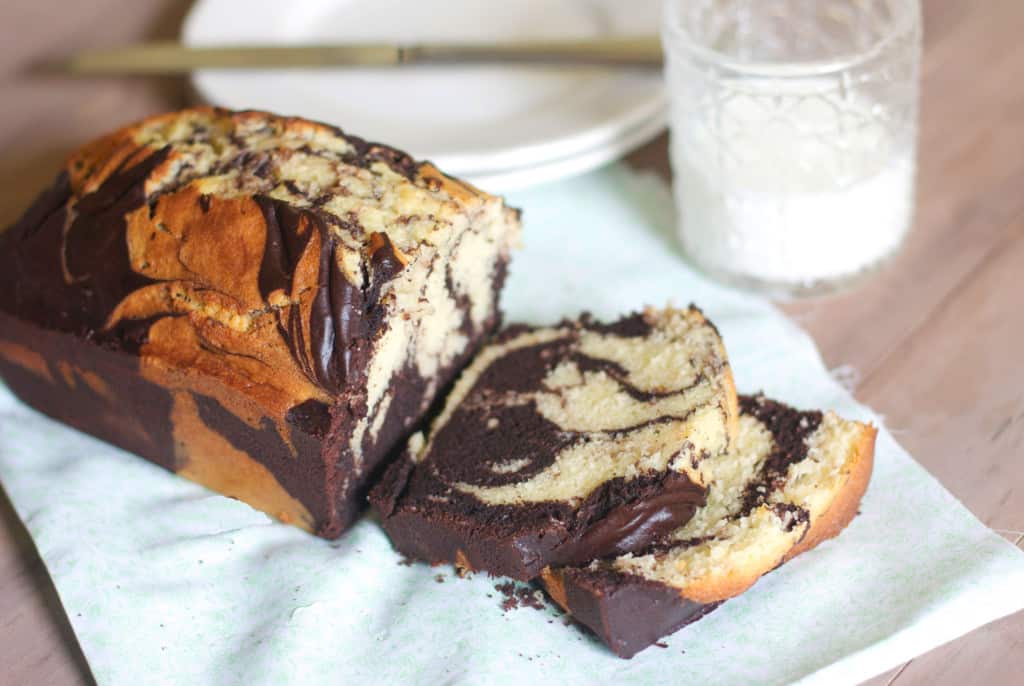 Instructions:
I’m so glad you posted this recipe!…I ate this when I was in Germany last year and feel in love with it and have been wanting to make it…Thank you!
sorry..”FELL” in love with it
Baking totally calms my nerves. I think that’s why I love it so much. This cake looks delicious. Happy almost 30!
Okay..this has nothing to do with the cake but your commercial. Too funny. I have to wonder does your hair look like that when you wake up in the mornings, just kidding. But I must also add, you are so pretty!
So funny right? My hair looks pretty bad in the mornings but not quite that bad :)
It looks BEAUTIFUL! Adding this to my “must-try” list!
I love a good marble pound cake! 30 is like the new 20!!
Please I have a question can I use all purpose flour instead of cake flour? Thanks God Bless.
Yummmm! This looks delicious. I’ve been baking a lot lately to generally avoid other household chores, so this is going on the list!
Get outta town, I literally JUST made a Marble Pound cake and posted it on my blog last week! And I was totally blown away with how much I loved it. I was actually tempted to make a strictly chocolate version because I loved how rich the chocolate parts were. Your cake is much more photogenic than mine though!
The 30’s are the BEST time for a woman b/c she finally finds confidence in the beauty of her size/shape/colour!
Happy Birthday, sweetheart!
30 is not that old. And if I look as good as you when I’m 30, I’ll be very excited!
Also, does the Keratin work? ;) Awesome commercial!! Hilarious, but you look gorgeous!
Tara I have to be honest with you- they didn’t actually use that product on me during that commercial. Crazy right? :)
Looks amazing! Going to make it this weekend!
your marble poundcake looks PERFECTLY swirled. thanks for the picture on how you actually got it to be so perfect – i never tried it that way so i’m definitely pinning this and making it really soon!! i LOVE pound cake – it’s such a treat in the mornings with a cup of coffee :)
This brings back memories of my youth, when I first discovered marble cake. Yours looks quite beautiful. Thanks for sharing the commercial too. Hilarious.
Can you sub all purpose flour for the cake flour?
Hey Lizzy,
I’ve only made this with cake flour so I can’t really know how it will turn out, but the general rule is: 1 cup of all purpose flour minus 2 tablespoons = one cup of cake flour. Hope that helps!
Isn’t swirling batter so much fun? I’m always nervous about what the pattern will look like after it bakes – yours is seriously gorgeous!
Oh, and that commercial? You are gorgeous my friend :)
Keep it up with good work
So thats how you get the perfect marble effect! I am super excited to try this recipe. Btw, I am twenty two but looking forward to turning thirty. Your thirties seem calmer, not so frenzied like your twenties.
Thanks Nicole!!
Don’t wish away your 20s though!! My metabolism will never be the same! :)
Oh I love marble cake! That was the cake of choice for my sister and I when we got cake mix at he store. I would get to eat the chocolate batter and my sister got the vanilla. I haven’t made marble cake in such a long, long time.
Hi, that looks delicious!
I was wondering if I could use all-purpose flour instead of cake flour. Have you tried it with all-purpose before and how did it turn out? I’d like to know beforehand so I know whether it’s worth the trouble of getting cake flour
Hey Jessa,
I’ve only made this with cake flour and I really recommend it. If you want to try AP flour, the general rule of substitution is 1 cup of cake flour = 1 cup- 2 Tablespoons of AP.
Let me know how it turns out if you end up using AP. I’m sure it would be more of a texture thing than anything else. Cake flour is finer which makes it very soft and velvety.
I made this as a trail and because i was in the mood of baking .. my overall rating is 5/5 honestly!! I Haven’t made a delicious marble cake like this before I used all purpose flour since this is all I’ve got at home, and of course same ingredients .. We don’t have Dutch process cacao powder in our country so I used the regular one!! It’s just great everyone liked it thanks for sharing
This is absolutely stunning! I never thought to do the checkerboard pattern with the batters, but your absolutely perfect “marble” has encouraged me to try this technique. Love it!
Hi, so I ended up buying the cake flour for this recipe. It was “enriched bleached cake flour.” However, I ended up using Hershey’s unsweetened cocoa because I didn’t believe there was a difference in the dutch-process. I don’t know if this is what altered the recipe or some other factor but my marble pound cake did not even look like a loaf of bread. It was sort of bubbly on the top (really small bubbles) and it sank down slightly where there was more of the chocolate mixture on top. It tastes ok, nothing special. The chocolate areas are slightly bitter. Could it have been a mixing problem to create the marble effect (i ended up mixing a lot) or something else like the cocoa?
Thanks for any feedback!
Hey Jessa!
So sorry about the snafu.
Yes- Dutch Process Cocoa powder is much different from regular- and is a must for this recipe. Dutch process has had it’s acidity tempered so it uses baking powder- regular cocoa powder in recipes is usually used with baking soda. There may have been a way to change this recipe to use regular cocoa- but I think the flavor of the dark, dutch process cocoa was perfect for this. (Even though it may be a pain in the butt to find.)
Here’s a great article from David Lebovitz who breaks it down as well :)
http://www.davidlebovitz.com/2010/02/cocoa-powder-faq-dutch-process-v/
YUM YUM!!! I have never made a marble cake but I must try it!! Looks like swirling would be a fun job for a kid… though mine is only 13 months, so batter would paint the walls rather than be swirled nicely in the loaf pan :) Happy birthday!! For me, it’s 31 this year :)
I made this yesterday…was SO excited for it to cool! Smelled & tasted great – however, it was really DRY!! If & when I make this again, I will use 1c (full-fat) SOUR CREAM in place of the 2/3c buttermilk.
Hey! I really want to make this cake but I only have a bundt pan. What are the changes I would have to make?
Hey Don- you’ll just have to swirl the batters together differently. Do a similar checkerboard-type pattern and it should work great!
I made it this weekend and I used all purpose flour (sifted few times) and it was delicious! really easy to make and without a lot of effort looks great!
thank you :)
I made this cake this weekend and it tasted AMAZING. I bake all dairy-free, so I used Earth Balance instead of butter and made my own buttermilk out of coconut milk and lemon juice. My batter wasn’t as thick as yours looks-do you know anything about dairy free baking? Do you think it was because of the coconut milk and not using regular buttermilk? Because it wasn’t as thick, I couldn’t make a checkerboard pattern with the batter and ended up doing the “dump and swirl” method, and layering the batters on top of each other in the loaf pan. Like I said, the taste was great, but I wonder how I could fix it to be prettier. Mine ended up a little brown looking, with darker swirls in places. Thanks for the recipe! It was a hit!
Can I replace buttermilk with whole milk?
You can make buttermilk by replacing lemon juice with a teaspoon of milk per cup!
I tried it out, and it turned out perfectlly! It was delicious! Thank you for this marvelous recipe!
My cocoa mixture was a bit watery, will my cake still turn out?
Have you ever used this recipe to make a layered cake?
Perfect recipe for pound cake. Everyone in my family love it. Thanks for perfection
My swirls didn’t turn out as pretty but the pound cake was really tender. Thanks for sharing!
Trying this recipe RIGHT NOW! Had a craving for marble pound cake…searched the web…your recipe looked to be the most delicious. Thanks, BakerChick! :)
Thank you! Let me know how it goes!
I made a bunch of substitutions so I could make this cake with what I already had in the house during a blizzard. I really wanted to make this cake and was determined to get it done! I hope I can help someone else who is in a similar predicament or doesn’t feel like going to the supermarket to pick up ingredients they are missing.
Here is what I used:
ingredients –
• ½ cup smart balance butter, softened (I always use this type when baking or making anything else!)
• 1¾ cups all-purpose flour minus 3 ¾ tbsp (didn’t have cake flour)
• 3 ¾ tbsp corn starch (for the all-purpose flour to be close to cake flour)
• 1 teaspoons baking soda (used with natural cocoa powder)
• ½ teaspoon salt
• 1 cup sugar
• 3 large eggs, room temperature
• 1 teaspoon pure almond extract (didn’t have vanilla)
• ⅔ cup plain yogurt (didn’t have buttermilk)
• ¼ cup plus 1 tablespoon cocoa powder (didn’t have dutch process)
• non-stick spray for pan (used a 9×9 square glass Pyrex pan, since I don’t own a loaf pan)
I followed the rest of the recipe exactly as described. Baked the cake for 40 mins total at 350 F.
It came out excellent! Very moist, just enough chocolate with a hint of almond!
Made this today, great texture with AP flour. Will make again, great size as apposed to 3 c. flour in most pound cakes. I dusted top with 10X but next time will drizzle a thin chocolate icing ontop. Gr8 cake.
Love this idea for having guests over! So easy, but looks so pretty!
Thank you for this recipe it turned out amazing. I actually added 2 tbs of Nutella to the chocolate and my family is going crazy for it.
Made this on Saturday! Loved loved loved it! Got a lot of compliments on it from friends and my husband!!
The only thing I wasn’t able to find was Dutch processed chocolate.. I looked in whole foods and trader joes. Is there a brand you use?
Thanks for the recipe!
Penzeys spices sells a Dutch process cocoa. Available in penzeys stores and on the penzeys website
I just made this cake and was excited about the outcome. But I decided to double the entire recipe and make two cakes. When I was preparing the chocolate batter, I used !/2 cup plus 1/2 Tbsp. cocoa., but also doubled the water. My batter looked like chocolate milk and not like batter. What did I do wrong? Your original recipe also calls for the same about of boiling water and cocoa. How does the picture of the chocolate batter look so thick and not watery? HELP. I really wanted this to turn out right.
Sounds like you quadrupled the cocoa/water measurement not doubled. It should have been 1/2 cup plus 2T of cocoa and 1/2 cup plus 4T boiling water. It should definitely not be that watery!!
Also did you stir the cocoa/water mixture into the reserved batter?
Are you are referring to the 1/4 cup of cocoa in the ingredients when you write in the directions (mix the cocoa powder and ¼ cup plus 2 tablespoons of boiling water until smooth). I added (like I thought it said) 1/4 cup plus 2 tablespoons of boiling water. And then I mixed it with the reserved batter. I will attempt to try it again but only use 2 tablespoons of water. I think it should have been written – mix the 1/4 cup of cocoa powder with 2 Tablespoons of water.
mix the cocoa powder and ¼ cup plus 2 tablespoons of boiling water until smooth.
I made this today for the first time and it was great. Most marble cakes, I do not like, as the chocolate part seems dry and harder than the vanilla part, but this was perfect by putting in the boiling water into the cocoa. I do, however, feel that there was too much boiling water as the batter was very watery (and did not look like your picture above) when I tried putting dollops into the pan. Nevertheless, the marble pound cake, was delicious and everyone really liked it! I will definitely be making this again!! Thank you.
Question: why only baking powder and not baking soda too because of buttermilk?
A suggestion – It would be easier if, instead of indicating that you should remove 1/3 of the batter to set aside, you gave a more precise measurement of what one third represents in cups. I found it difficult to eyeball how much 1/3 would be and consequently I think I used too much to mix in the chocolate, which diluted the chocolate flavor.
Good point- thanks for the feedback!
Can you share the measurements in grams please